[vc_row][vc_column][vc_empty_space height=”80″][/vc_column][/vc_row][vc_row][vc_column width=”1/6″][/vc_column][vc_column width=”2/3″][vcj_heading style=”style1″ size=”default” animation_speed=”2″ animation_delay=”0″]
Goldshell miners Log Files Acquisition Tutorial
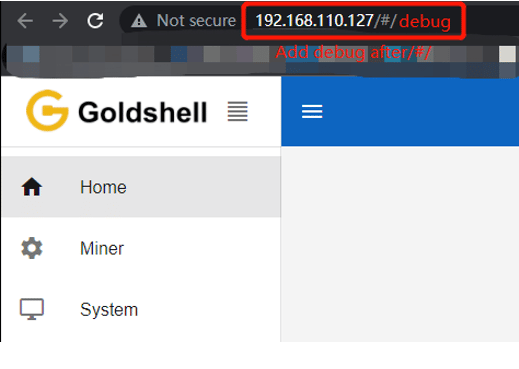
[/vcj_heading][vc_btn title=”More Tutorial” style=”outline-custom” outline_custom_color=”#000000″ outline_custom_hover_background=”#fac230″ outline_custom_hover_text=”#000000″ size=”xs” align=”right” link=”url:https%3A%2F%2Fwww.goldshell.com%2Ftutorials%2F|||”][vc_column_text]Step 1: Login your miner dashboard successfully and add /#/debug character after the IP address.
For example: the test miner IP is 192.168.110.127, then we add /#/debug character (192.168.110.127/#/debug) and turn to the Log page.
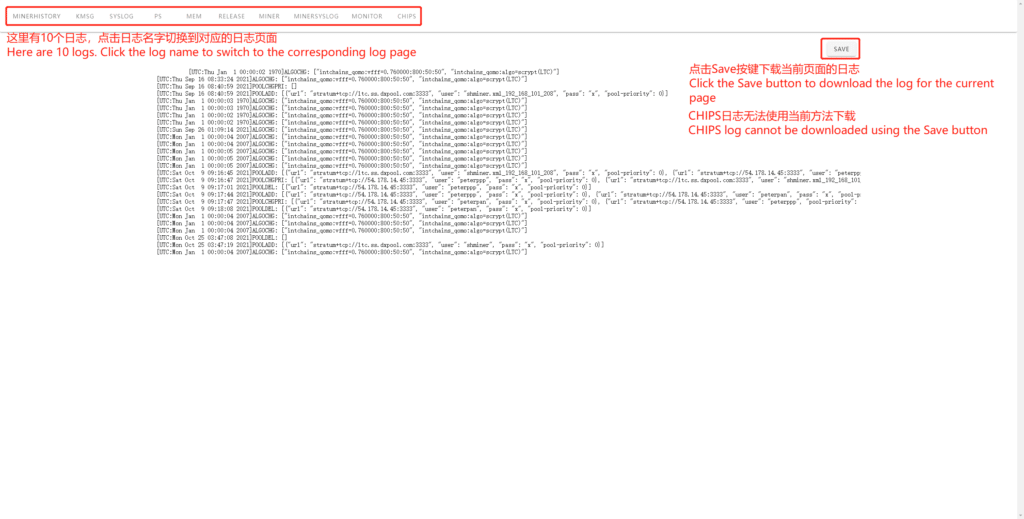
Step 2: When turn to log page, here are 10 logs.
Click the log name to switch to the corresponding log page, and click “SAVE” button to download the log for the current page.
Note: CHIPS log needs to use the below methods.
[/vc_column_text][vc_separator][vc_column_text]CHIPS log files acquisition method
Method 1: Use your browser to convert the log files to PDF
- Open the “CHIPS” webpage and press Ctrl+P, will display print notifications
- Click “More Settings”, select option of “Background graphics” and “Headers and footers”
- Click on the Printer and scroll down options (or select drop-down box), and click select Save as PDF
- Click Save to finish.
Method 2: Use computer screenshot software to take screenshots (this method does not provide a tutorial).[/vc_column_text][/vc_column][vc_column width=”1/6″][/vc_column][/vc_row]